
www.vivitar.com user manual
Vivitar distributed rebranded cameras from Japanese manufacturers, and accessing user manuals via www.vivitar.com can be challenging due to historical models.
Historical Context of Vivitar
Vivitar emerged in the 1960s not as a camera manufacturer, but as a distributor. They skillfully rebranded cameras produced primarily by established Japanese companies like Canon, Konica, and others, offering them to a wider market. This business model allowed Vivitar to flourish, becoming a prominent name in photography without the complexities of factory production.
Finding comprehensive historical documentation, including original user manuals, directly on www.vivitar.com can prove difficult. The company’s focus shifted over time, and records for these older, rebranded models aren’t always readily available. Many enthusiasts rely on third-party archives and online communities to locate manuals for these classic Vivitar cameras, reflecting the brand’s unique distribution-focused history.
The Role of User Manuals for Vivitar Products
Given Vivitar’s history as a distributor of rebranded cameras, user manuals played a crucial role in clarifying functionality. Because models varied significantly based on the original manufacturer, understanding the specific camera required accurate documentation. These manuals bridged the gap, explaining features and operation despite the Vivitar branding.
Locating these manuals today, even through www.vivitar.com, can be challenging. The sheer diversity of rebranded models means a single, comprehensive resource is unlikely. User manuals were essential for navigating the nuances of each camera, from film loading to focusing techniques, ensuring users could fully utilize their Vivitar product.

Understanding Vivitar Camera Types
Vivitar offered diverse cameras – 35mm rangefinders, early digital models like the Digital Mavica, and those built in collaboration with Japanese manufacturers.
35mm Rangefinder Cameras (1960s-1980s)
During the 1960s through the 1980s, Vivitar became well-known for its 35mm rangefinder cameras, often marketed towards amateur photographers seeking a compact and affordable alternative to the prestigious Leica rangefinders. These cameras were frequently produced by Japanese manufacturers like Canon, Fujica, Konica, and others, then rebranded and distributed by Vivitar and Revue.
These cameras prioritized portability and ease of use, featuring fixed lenses and relying on an optical rangefinder system for focusing, utilizing parallax for accurate distance estimation. While less expensive than Leica, they provided a viable entry point into 35mm photography. Finding specific user manuals for these older models on www.vivitar.com can prove difficult due to their age and the rebranding practices of the time.
Vivitar’s Collaboration with Japanese Manufacturers
Vivitar operated primarily as a distributor, forging strong relationships with numerous Japanese camera manufacturers – Canon, Fujica, Konica, Mamiya, Minolta, Olympus, Petri, Ricoh, and Yashica, among others. Instead of manufacturing cameras themselves, Vivitar would contract these companies to produce cameras to their specifications, then rebrand and sell them under the Vivitar name.
This business model allowed Vivitar to offer a wide range of cameras at competitive prices; Locating original user manuals on www.vivitar.com for these collaboratively-produced cameras can be challenging, as documentation often reflects the original manufacturer rather than Vivitar’s branding.
Digital Cameras ⸺ Early Models (Digital Mavica)
Vivitar’s foray into digital photography began with the Digital Mavica series, a pioneering line of still video cameras. Unlike later digital cameras, the Digital Mavica recorded images onto standard 3-inch magnetic floppy discs, simplifying data transfer to computers. These cameras didn’t feature a traditional SLR viewfinder, representing a significant departure from film-based photography.
Finding a dedicated user manual for the Digital Mavica on www.vivitar.com proves difficult, as these early models predate comprehensive online documentation. Users often relied on included quick-start guides or sought information from third-party sources due to limited official support.
Key Features Found in Vivitar Cameras
Vivitar cameras featured both manual and auto focusing, optical rangefinders utilizing parallax, and some employed closed-loop controller systems for focus accuracy.
Focusing Mechanisms: Manual vs. Auto
Vivitar cameras showcased a diverse range of focusing mechanisms, prominently featuring both manual and automatic systems. Early Vivitar rangefinder cameras relied heavily on manual focus, requiring photographers to visually align images using the optical rangefinder. This method, while demanding skill, offered precise control.
Later models incorporated auto-focus capabilities, often utilizing closed-loop controller systems. These systems analyzed the image and automatically adjusted the lens for optimal sharpness. The effectiveness of auto-focus varied depending on the specific model and lighting conditions. Understanding the nuances of each focusing method, as detailed in a Vivitar user manual (if available), is crucial for achieving desired results. The choice between manual and auto-focus often depended on the photographer’s preference and the shooting scenario.
Optical Rangefinders and Parallax
Vivitar’s 35mm rangefinder cameras utilized optical rangefinders, a system employing parallax to determine focus. This involved splitting the image into two and aligning them visually. However, understanding parallax – the difference in apparent position of an object viewed from different angles – is vital for accurate focusing.
Parallax error is more pronounced at closer distances, requiring adjustments based on the subject’s proximity. A Vivitar user manual, if accessible via www.vivitar.com or other sources, would typically explain these adjustments. Mastering rangefinder focusing demands practice and awareness of parallax effects to ensure sharp images, especially in close-up photography. Correcting for parallax ensures the focused point aligns with the intended subject.
Closed-Loop Controller Focusing Systems
Most digital cameras, unlike traditional Vivitar rangefinders, employ closed-loop controller focusing. This system analyzes the image captured by the lens, automatically adjusting focus until peak sharpness is achieved. Distance estimation isn’t primary; it’s a byproduct of this process. A Vivitar digital camera user manual, potentially found on www.vivitar.com, would detail autofocus modes and settings.
These systems continuously refine focus, offering speed and convenience. Understanding how to select appropriate autofocus modes (single, continuous, etc.) is crucial for optimal results. While offering ease of use, mastering manual override options remains valuable for specific photographic scenarios, as detailed in comprehensive camera guides.
Navigating a Vivitar User Manual
Locating specific Vivitar manuals on www.vivitar.com can be difficult due to the brand’s history of rebranded cameras and older models.
Locating Your Specific Model’s Manual
Finding a user manual for your Vivitar camera can present unique challenges, largely due to the company’s business model of rebranding cameras manufactured by other Japanese companies like Canon, Konica, and Minolta. www.vivitar.com, the official website, may not host archives for every historical model.
Begin by carefully examining your camera for a model number, often found on the front, top, or within the battery compartment. With this number, search directly on www.vivitar.com. If unsuccessful, broaden your search to include the original manufacturer’s name alongside “user manual” and the model number. Online forums and vintage camera communities (discussed later) are invaluable resources, often hosting scanned copies of manuals. Be prepared to identify the original manufacturer to increase your chances of success, as Vivitar manuals themselves can be scarce.
Understanding Manual Sections: A General Overview
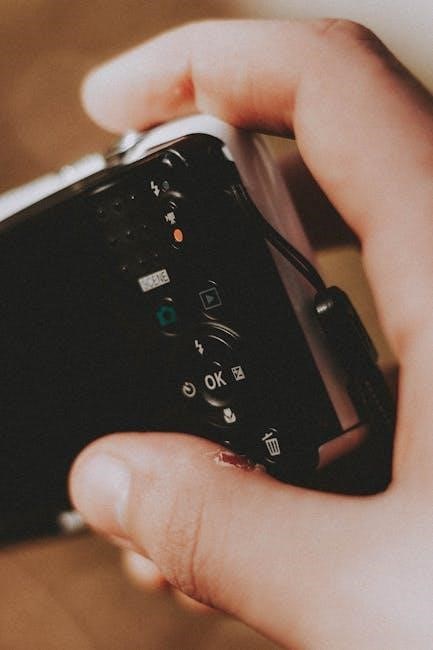
Vivitar camera manuals, regardless of the original manufacturer, generally follow a standard structure. Expect sections detailing camera components, film loading (for film models), battery installation, and basic operational procedures. A crucial section explains the focusing mechanisms – manual or auto, and how to utilize optical rangefinders or closed-loop controller systems.
Exposure settings, including aperture and shutter speed control, are typically explained in detail. Look for sections on utilizing the built-in light meter (if equipped) and understanding parallax correction when using an optical rangefinder. While www.vivitar.com may not offer all historical manuals, understanding this general layout will aid in deciphering instructions from similar cameras of the era.
Decoding Camera Settings & Functions
Vivitar cameras, often rebranded models, present settings familiar to those versed in 35mm photography. Aperture controls dictate lens opening, impacting depth of field, while shutter speed governs exposure time. Understanding these interactions is key. Manual focus requires precise adjustment using the lens’s focusing ring, potentially aided by an optical rangefinder and parallax compensation.
Digital models, like the Digital Mavica, introduce settings for image quality, flash control, and data storage on floppy discs. Though www.vivitar.com’s resources may be limited, recognizing these core functions – regardless of the camera’s age – unlocks its full potential. Closed-loop controller systems automate focusing, requiring understanding of their operational logic.

Troubleshooting Common Vivitar Camera Issues
Common problems include focusing errors, film loading difficulties, and battery failures; www.vivitar.com may offer limited support for older models’ specific issues.
Focusing Problems & Solutions
Focusing issues in Vivitar cameras, particularly older models, often stem from inaccurate rangefinder alignment or degraded lens elements. For rangefinder cameras, check for parallax error, especially at close distances – www.vivitar.com might have diagrams illustrating this. If the rangefinder image is faint or doubled, professional servicing is recommended.
With cameras utilizing closed-loop controller focusing systems, ensure the lens is clean and free of obstructions. If autofocus fails, try manual focus as a diagnostic step. The official website may offer limited troubleshooting for these systems. Remember that older models relied heavily on user technique; practice and careful observation are key. Inspect the lens mount for damage or debris, as this can also affect focus accuracy.
Film Loading & Advance Issues (for Film Cameras)
Film loading problems in Vivitar cameras frequently involve incorrect threading or a malfunctioning film advance mechanism. Consult www.vivitar.com, though resources for older models are scarce. Ensure the film leader is properly engaged with the take-up spool. If the film doesn’t advance, check the advance lever for smooth operation and listen for any unusual noises.
A common issue is a stuck film rewind knob; avoid forcing it. Inspect the film chamber for obstructions. If the camera consistently jams or tears film, professional cleaning and servicing are advisable. Remember to select the correct ISO setting on the camera before loading film. Proper film loading technique, detailed in some manuals, is crucial for successful operation.
Battery Issues & Power Management
Battery problems are common in Vivitar cameras, especially older models. www.vivitar.com may offer limited support for vintage cameras’ power requirements. Ensure correct battery type and polarity are observed. Weak batteries cause dim viewfinders or camera malfunction. For digital models, check battery contacts for corrosion and consider a full charge before use.
If the camera drains power quickly, investigate potential causes like continuous autofocus or image stabilization. Some models feature power-saving modes; utilize these when possible. Regularly remove batteries during prolonged storage to prevent leakage and damage. Always dispose of batteries responsibly, following local regulations.
Advanced Features & Techniques (Where Applicable)
Some advanced Vivitar cameras featured optical image stabilization (OIS) and 4K video, though www.vivitar.com’s manual support for these features varies greatly.

Using Optical Image Stabilization (OIS)
Optical Image Stabilization (OIS) is a valuable feature found in some later Vivitar digital camera models, designed to counteract camera shake and produce sharper images, particularly in low-light conditions or when using longer zoom ranges. The www.vivitar.com user manual, if available for your specific model, will detail how to activate and utilize this function.
Typically, OIS is enabled through a camera menu setting. The manual will explain whether OIS operates continuously or offers different modes, such as a panning mode for tracking moving subjects. Understanding these modes is crucial for optimal performance. It’s important to note that OIS effectiveness can vary depending on the amount of camera shake and the shooting conditions. Referencing the manual will provide specific guidance for maximizing OIS benefits with your Vivitar camera.
Understanding 4K Video Capabilities
If your Vivitar camera boasts 4K video recording, the www.vivitar.com user manual is essential for unlocking its full potential. 4K video offers significantly higher resolution than standard HD, resulting in incredibly detailed footage. The manual will guide you through selecting the 4K recording mode within the camera’s menu system, and explain any associated settings like frame rates (24fps, 30fps, or 60fps).
It will also detail the required storage media – 4K video files are large and necessitate a high-capacity, fast SD card. Pay attention to any limitations regarding recording time or potential overheating. The manual should clarify how to adjust audio settings during 4K video capture for optimal sound quality, and provide troubleshooting tips if you encounter any issues.
Utilizing Zoom Lens Functionality
The www.vivitar.com user manual is crucial for understanding your camera’s zoom lens capabilities. Some advanced camera phones, as noted, featured optical zoom, utilizing a physical zoom lens. The manual will detail how to operate the zoom function – whether it’s a dedicated zoom ring, buttons, or a digital zoom option. It will explain the difference between optical and digital zoom, emphasizing that optical zoom maintains image quality while digital zoom crops the image.
Furthermore, the manual will guide you on utilizing the zoom effectively for different shooting scenarios, and explain any limitations regarding zoom range or image stabilization when zoomed in. It may also cover techniques for smooth zooming during video recording.
Vivitar and Lens Compatibility
Vivitar cameras, particularly specific models, offered Nikkor lens mount compatibility, detailed in the www.vivitar.com user manual for optimal lens selection.
Nikkor Lens Mount Compatibility (Specific Models)
Certain Vivitar cameras historically featured compatibility with Nikkor lenses, a significant advantage for photographers already invested in the Nikon system. The www.vivitar.com user manual, when available for specific models, often details this compatibility, outlining which Vivitar bodies accept Nikkor lenses with the appropriate mount.
This compatibility allowed users to leverage Nikon’s extensive range of lenses, including both older AI and AIS manual focus lenses, expanding creative possibilities. However, it’s crucial to consult the specific camera’s manual – found, ideally, on www.vivitar.com – to confirm compatibility and any necessary adapters. Not all Vivitar cameras supported Nikkor lenses, and proper adaptation might be required for full functionality.
Using AI/AIS Manual Focus Lenses
When utilizing Nikon AI or AIS manual focus lenses on compatible Vivitar cameras, understanding their operation is key. The www.vivitar.com user manual, if accessible for your model, should detail any specific considerations. These lenses require manual focusing using the lens’s focus ring and the camera’s viewfinder or focusing aids.
Exposure metering is also manual, necessitating the use of the camera’s built-in meter or a handheld light meter. The AI/AIS lenses offer excellent optical quality, but require a more deliberate shooting approach. Checking www.vivitar.com for compatibility charts and specific instructions is vital for optimal performance and avoiding potential issues.

Resources for Vivitar Camera Support
Vivitar’s official website, www.vivitar.com, offers limited support for older models; online forums and communities are often better resources for manuals.
Online Forums and Communities
Given the historical nature of many Vivitar cameras and the limited archival support on www.vivitar.com, online forums and dedicated photography communities represent invaluable resources for locating user manuals and troubleshooting assistance. Enthusiasts frequently share scanned copies of original manuals, offering a lifeline for owners of vintage models. These platforms also foster discussions where users can exchange knowledge about specific camera functions, repair tips, and lens compatibility.
Websites and forums dedicated to classic cameras, 35mm photography, and vintage lenses often have sections specifically addressing Vivitar products. Searching these communities with your camera model number can quickly yield relevant information. Remember to contribute back to these communities by sharing your own experiences and knowledge, helping to preserve the legacy of Vivitar cameras for future generations of photographers.
Repair Services and Parts Availability
Finding repair services and replacement parts for Vivitar cameras can be complex, particularly for older models, as www.vivitar.com doesn’t directly offer extensive support for vintage equipment. Specialized camera repair shops focusing on classic or film cameras are often the best option. These technicians possess the expertise to diagnose and fix issues with Vivitar’s mechanical and optical systems.
Sourcing parts may involve searching online auction sites, used camera retailers, or dedicated parts suppliers. Compatibility can be a concern, especially given Vivitar’s collaboration with various Japanese manufacturers. Be prepared to provide precise model details when seeking repairs or parts to ensure accurate service and component matching. Patience and diligent searching are often key to restoring a Vivitar camera to working order.
Vivitar’s Official Website (www.vivitar.com)
Currently, www.vivitar.com primarily focuses on modern consumer electronics, including Bluetooth speakers, headphones, and action cameras, rather than its historical line of film cameras. Locating user manuals for vintage Vivitar cameras directly on the site is often difficult. The website’s support section mainly caters to current product offerings, providing limited resources for older models.
However, the site may offer contact information for customer support, who might be able to provide guidance or point you towards archived resources. Users seeking manuals for classic Vivitar cameras are generally better served by exploring online forums, dedicated camera websites, and third-party archive sites, as the official website’s historical documentation is sparse.